 Karl Lankester-Carthy
Enviro+ Board
I recently bought an Enviro+ board from Pimoroni, a piece of tech I've had my eye on for a while. Finally, I got around to adding it to my collection, and I'm excited to share my experience with it.
The Enviro+ is a versatile board equipped with a variety of sensors that measure temperature, pressure, light, and air quality. It also features a small screen to display the sensor data, which is pretty cool. The board can be attached to any Raspberry Pi with 40 pins; I have mine connected to a Raspberry Pi Zero W.
Pimoroni provides a Python library for the Enviro+, making it super easy to get started. You can find the library here
I've spent a few days playing around with the board, utilizing the provided examples and experimenting with a project I found on GitLab called Enviro Plus Web, which offers a web interface for the board. You can check out that project here.
One challenge I've encountered is creating a proper case for the board. Currently, I have it connected to the Pi with a ribbon cable, and it's just hanging off the Pi:
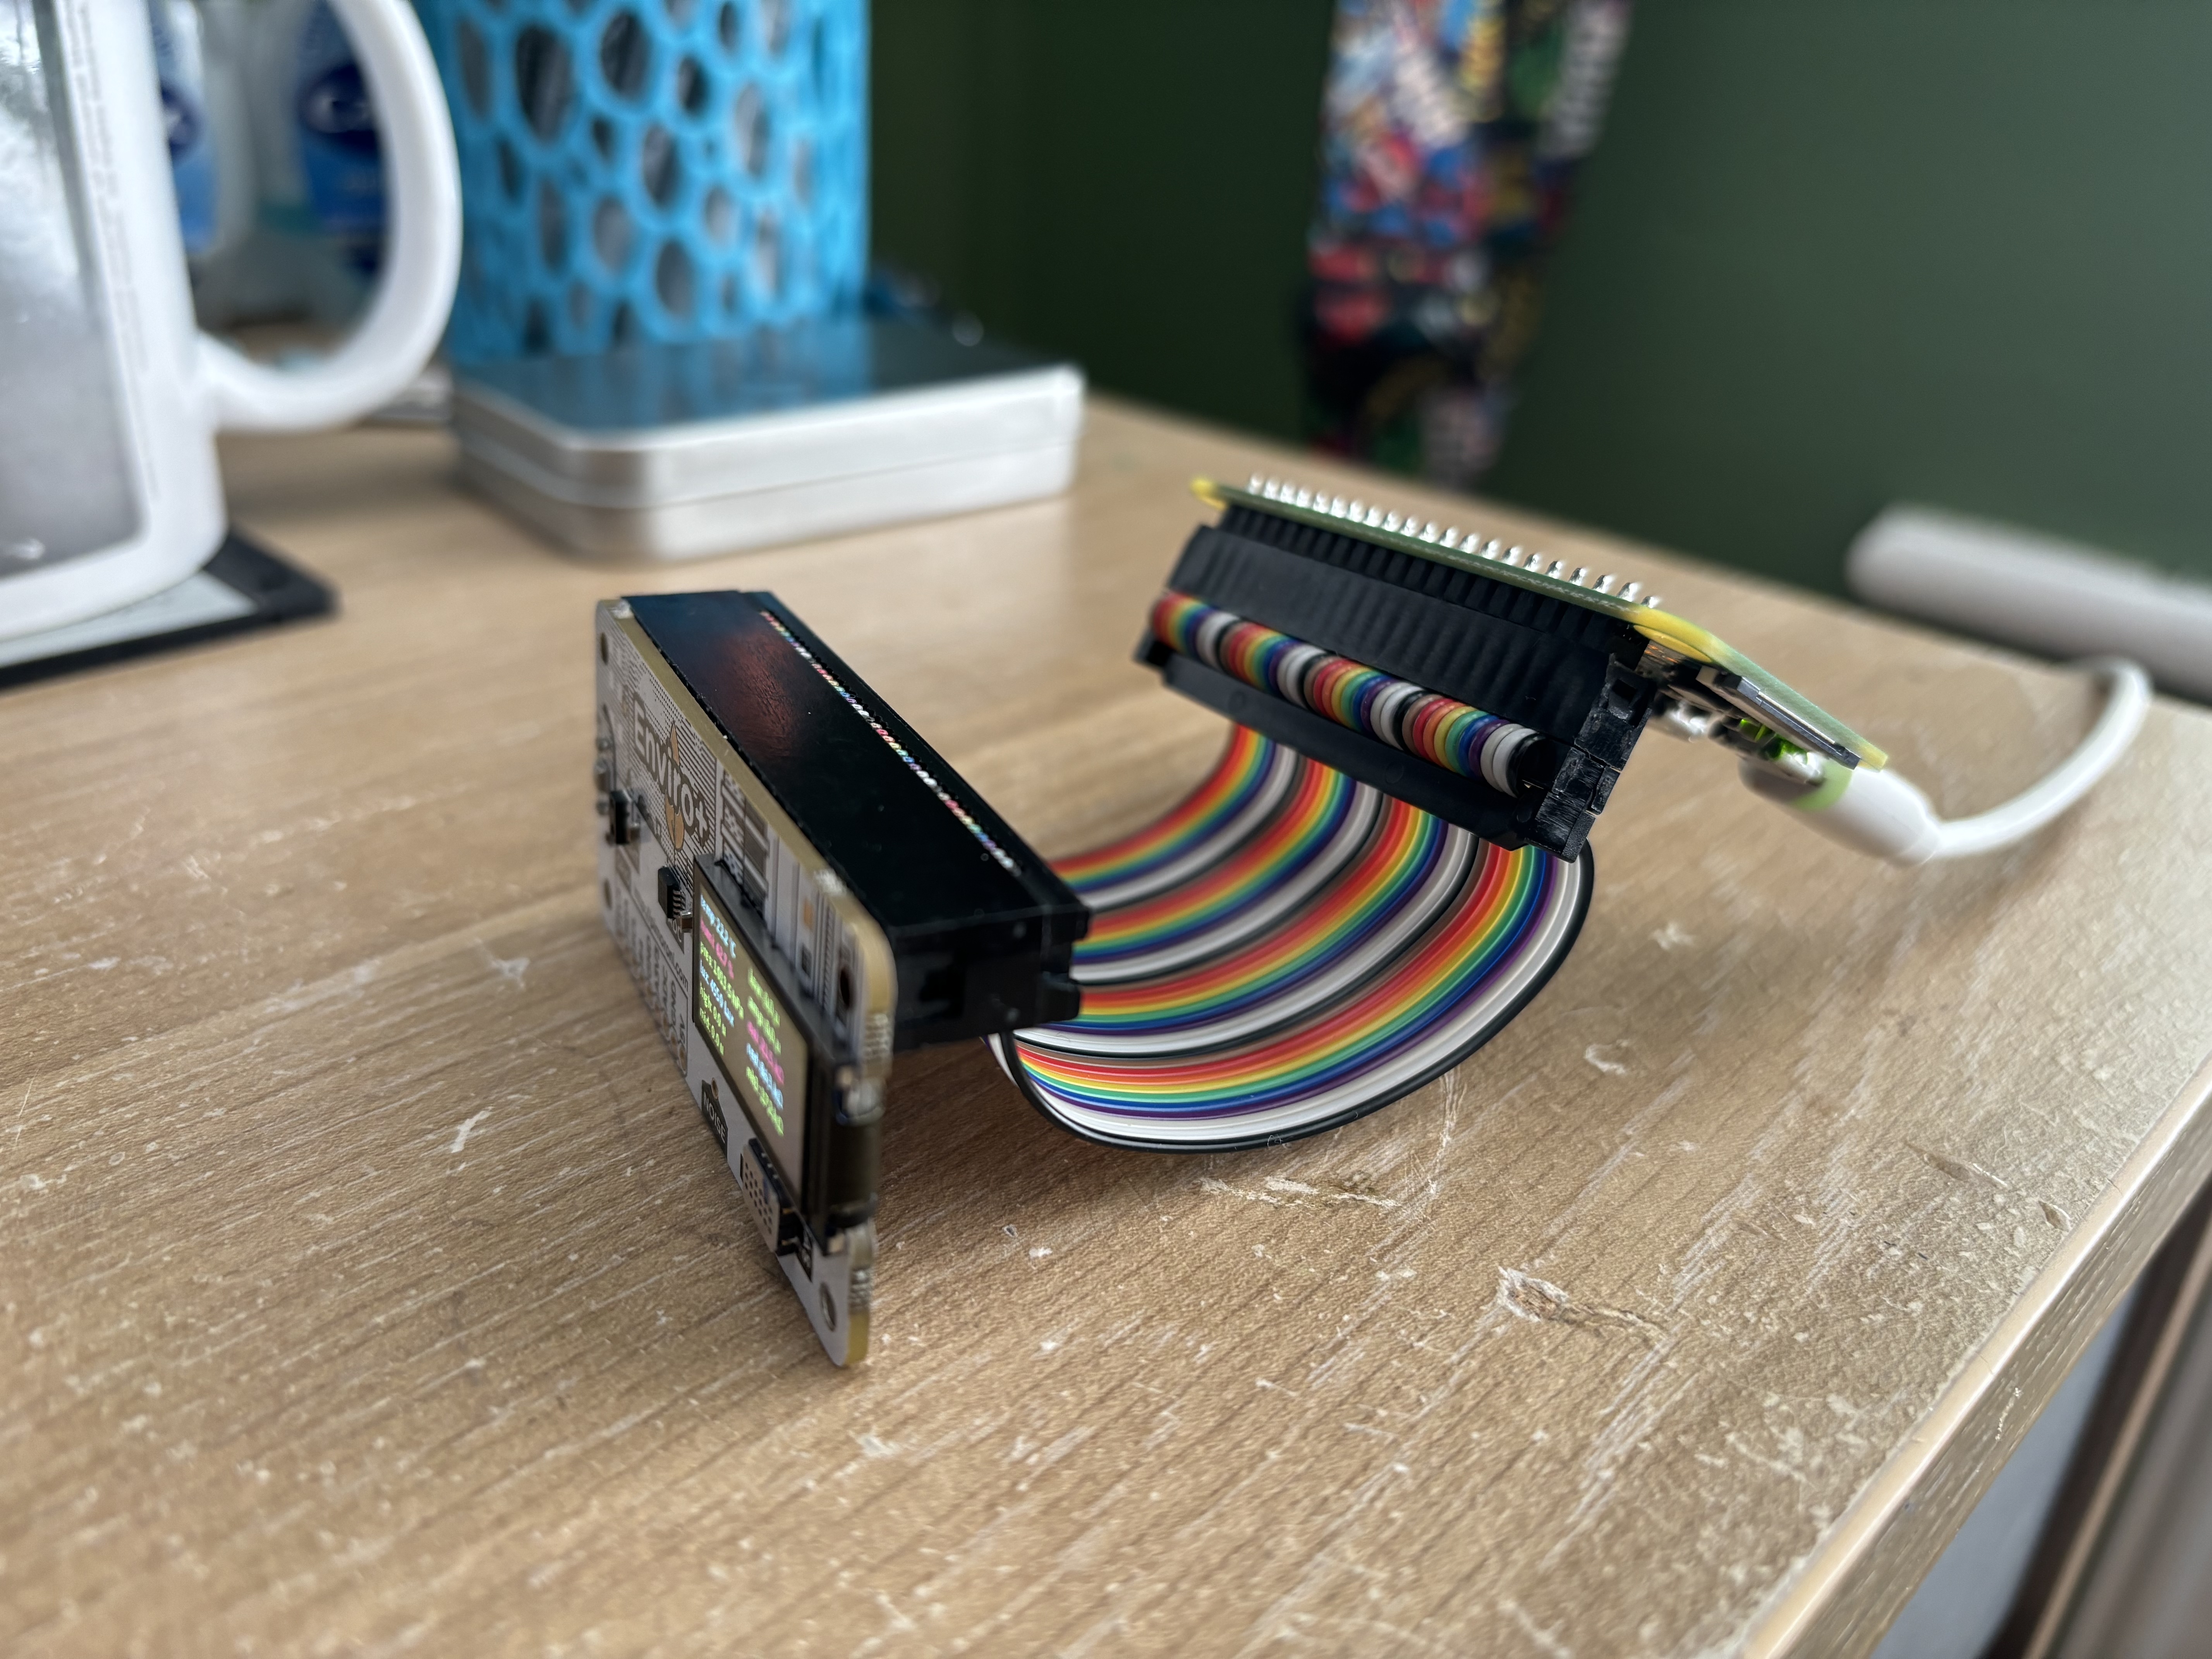
This setup is far from ideal, so I decided to design some housing for it. My plan is to have a window on the front for the Enviro+ screen, with the Pi attached to the top of the housing, allowing the power cable to feed out the back.
After taking some measurements, I got to work in Tinkercad (shut up!, I like it!). I created a model for the case and exported it as an STL file.
STL Model
I have a 3d model below that you can interact with, you can download the files via thingyverse here: Enviro+ and Raspberry Pi Zero case
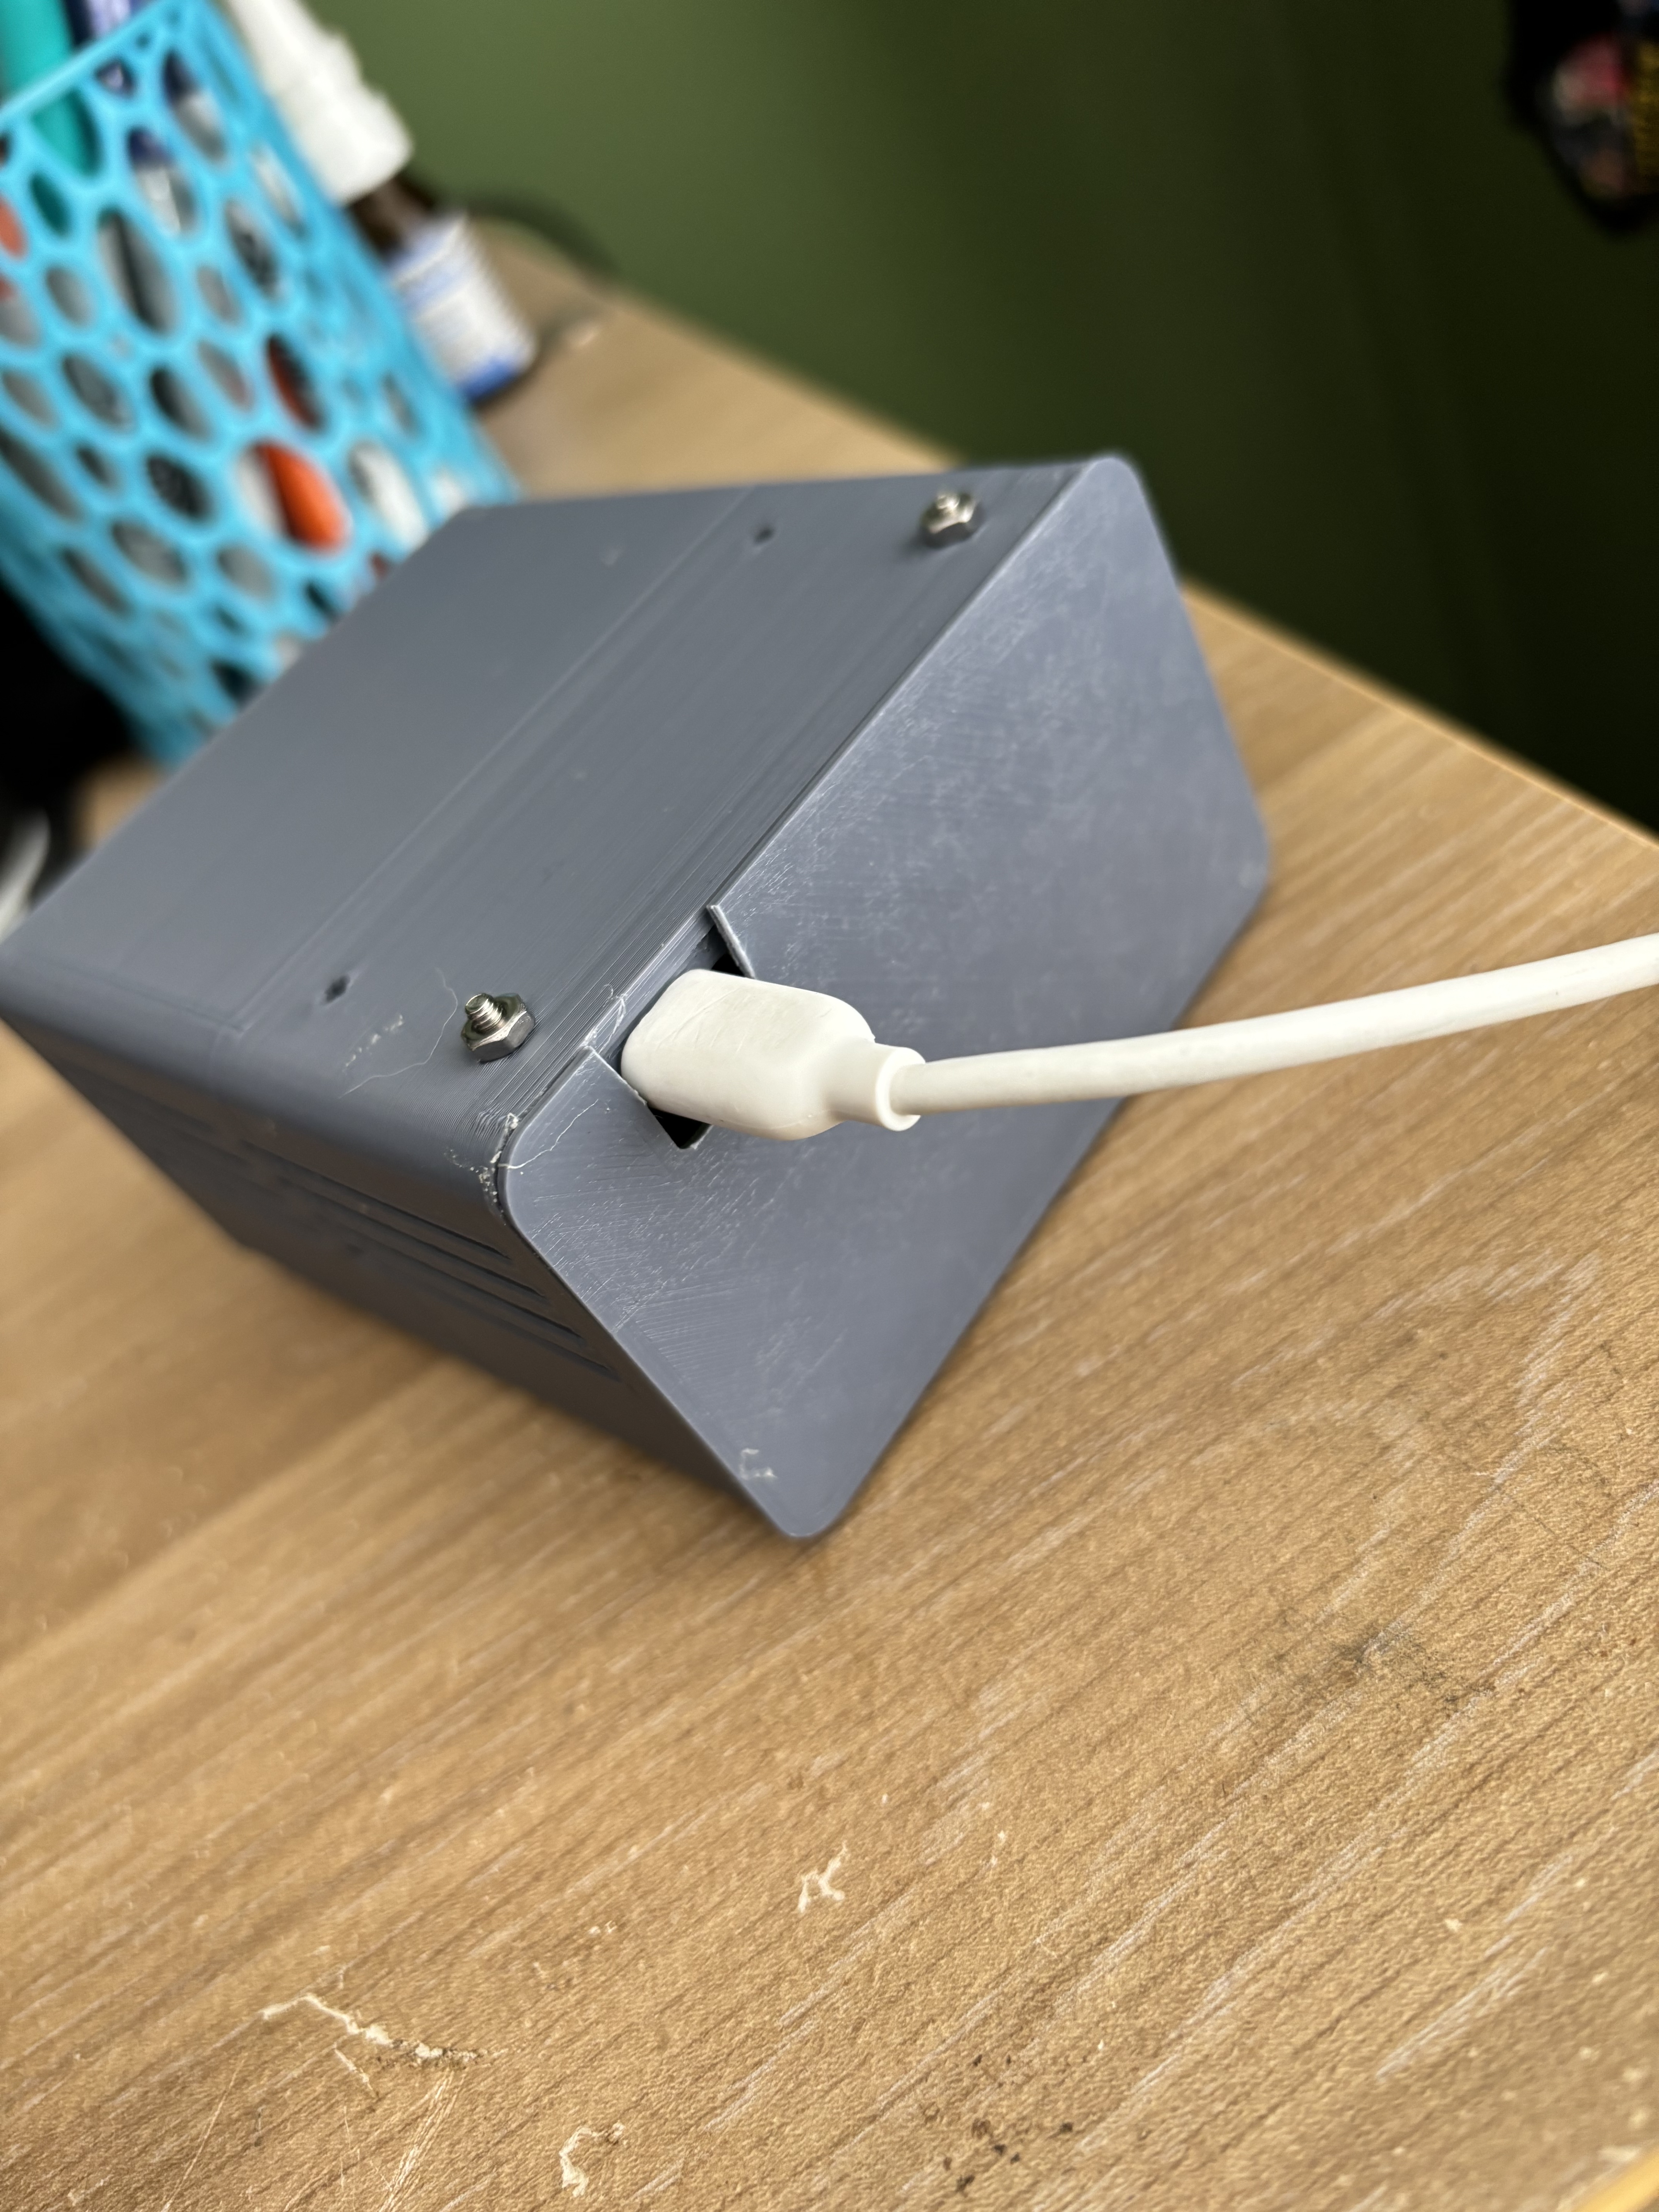
I'm fairly happy with the design so far. The plan is to use magnets for the back panel, allowing easy access to the Pi. The Pi itself will be screwed into the case, and the board will be connected to the Pi with a ribbon cable, making the screen visible through the front panel. I also included a section for the Pi to fit into snugly, to avoid any potential issues. Additionally, there's a hole in the back panel for the power cable to exit.
Finished Result
And here is the finished result:
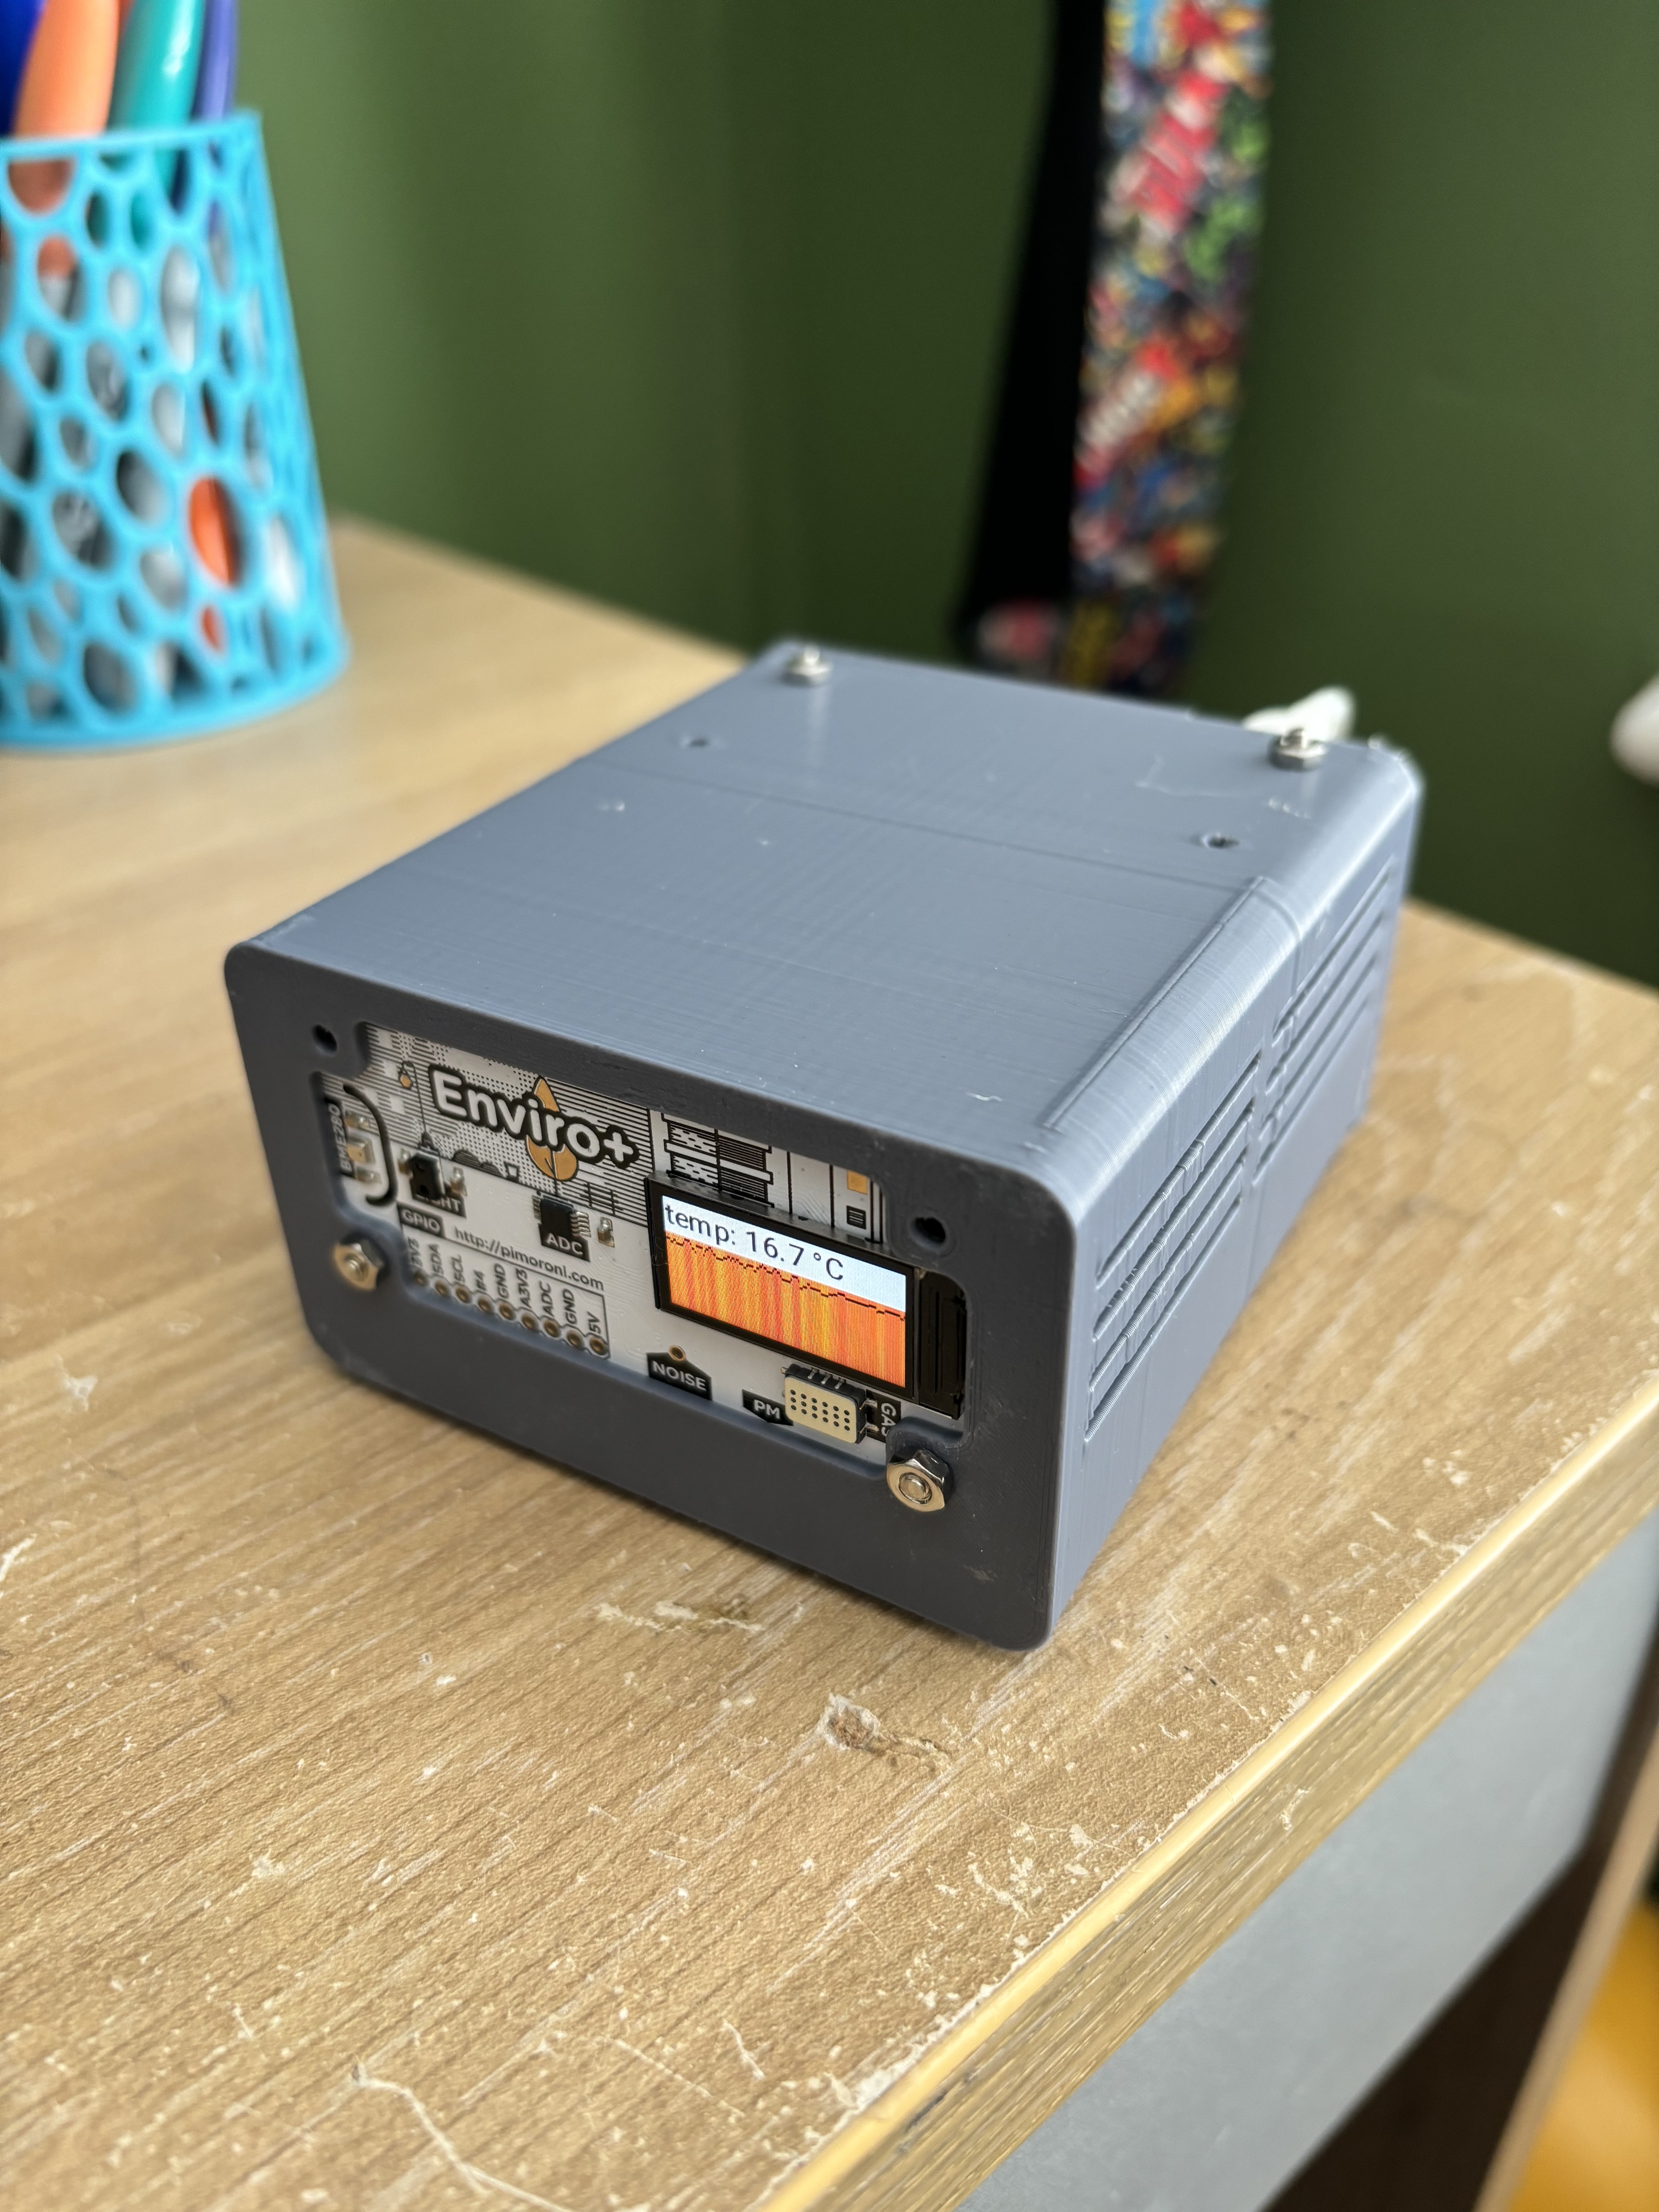
I ended up not using all the screw holes as the ribbon cable I'm using blocks the top two screw holes for the enviro+ board. I'm not too worried about it as the board is held in place pretty well with just the two screws. I also didn't use all four for the raspberry pi as I found it difficult to get to the back screw holes, but again the pi is held in place well with just the two screws. Maybe I'll remove this in my next iteration.
Looking inside we can see the pi attached to the top of the case, I've added a heat sink to the pi to help with cooling, some rubber feat to the bottom of the case and some tiny magnets to hold the back panel in place. 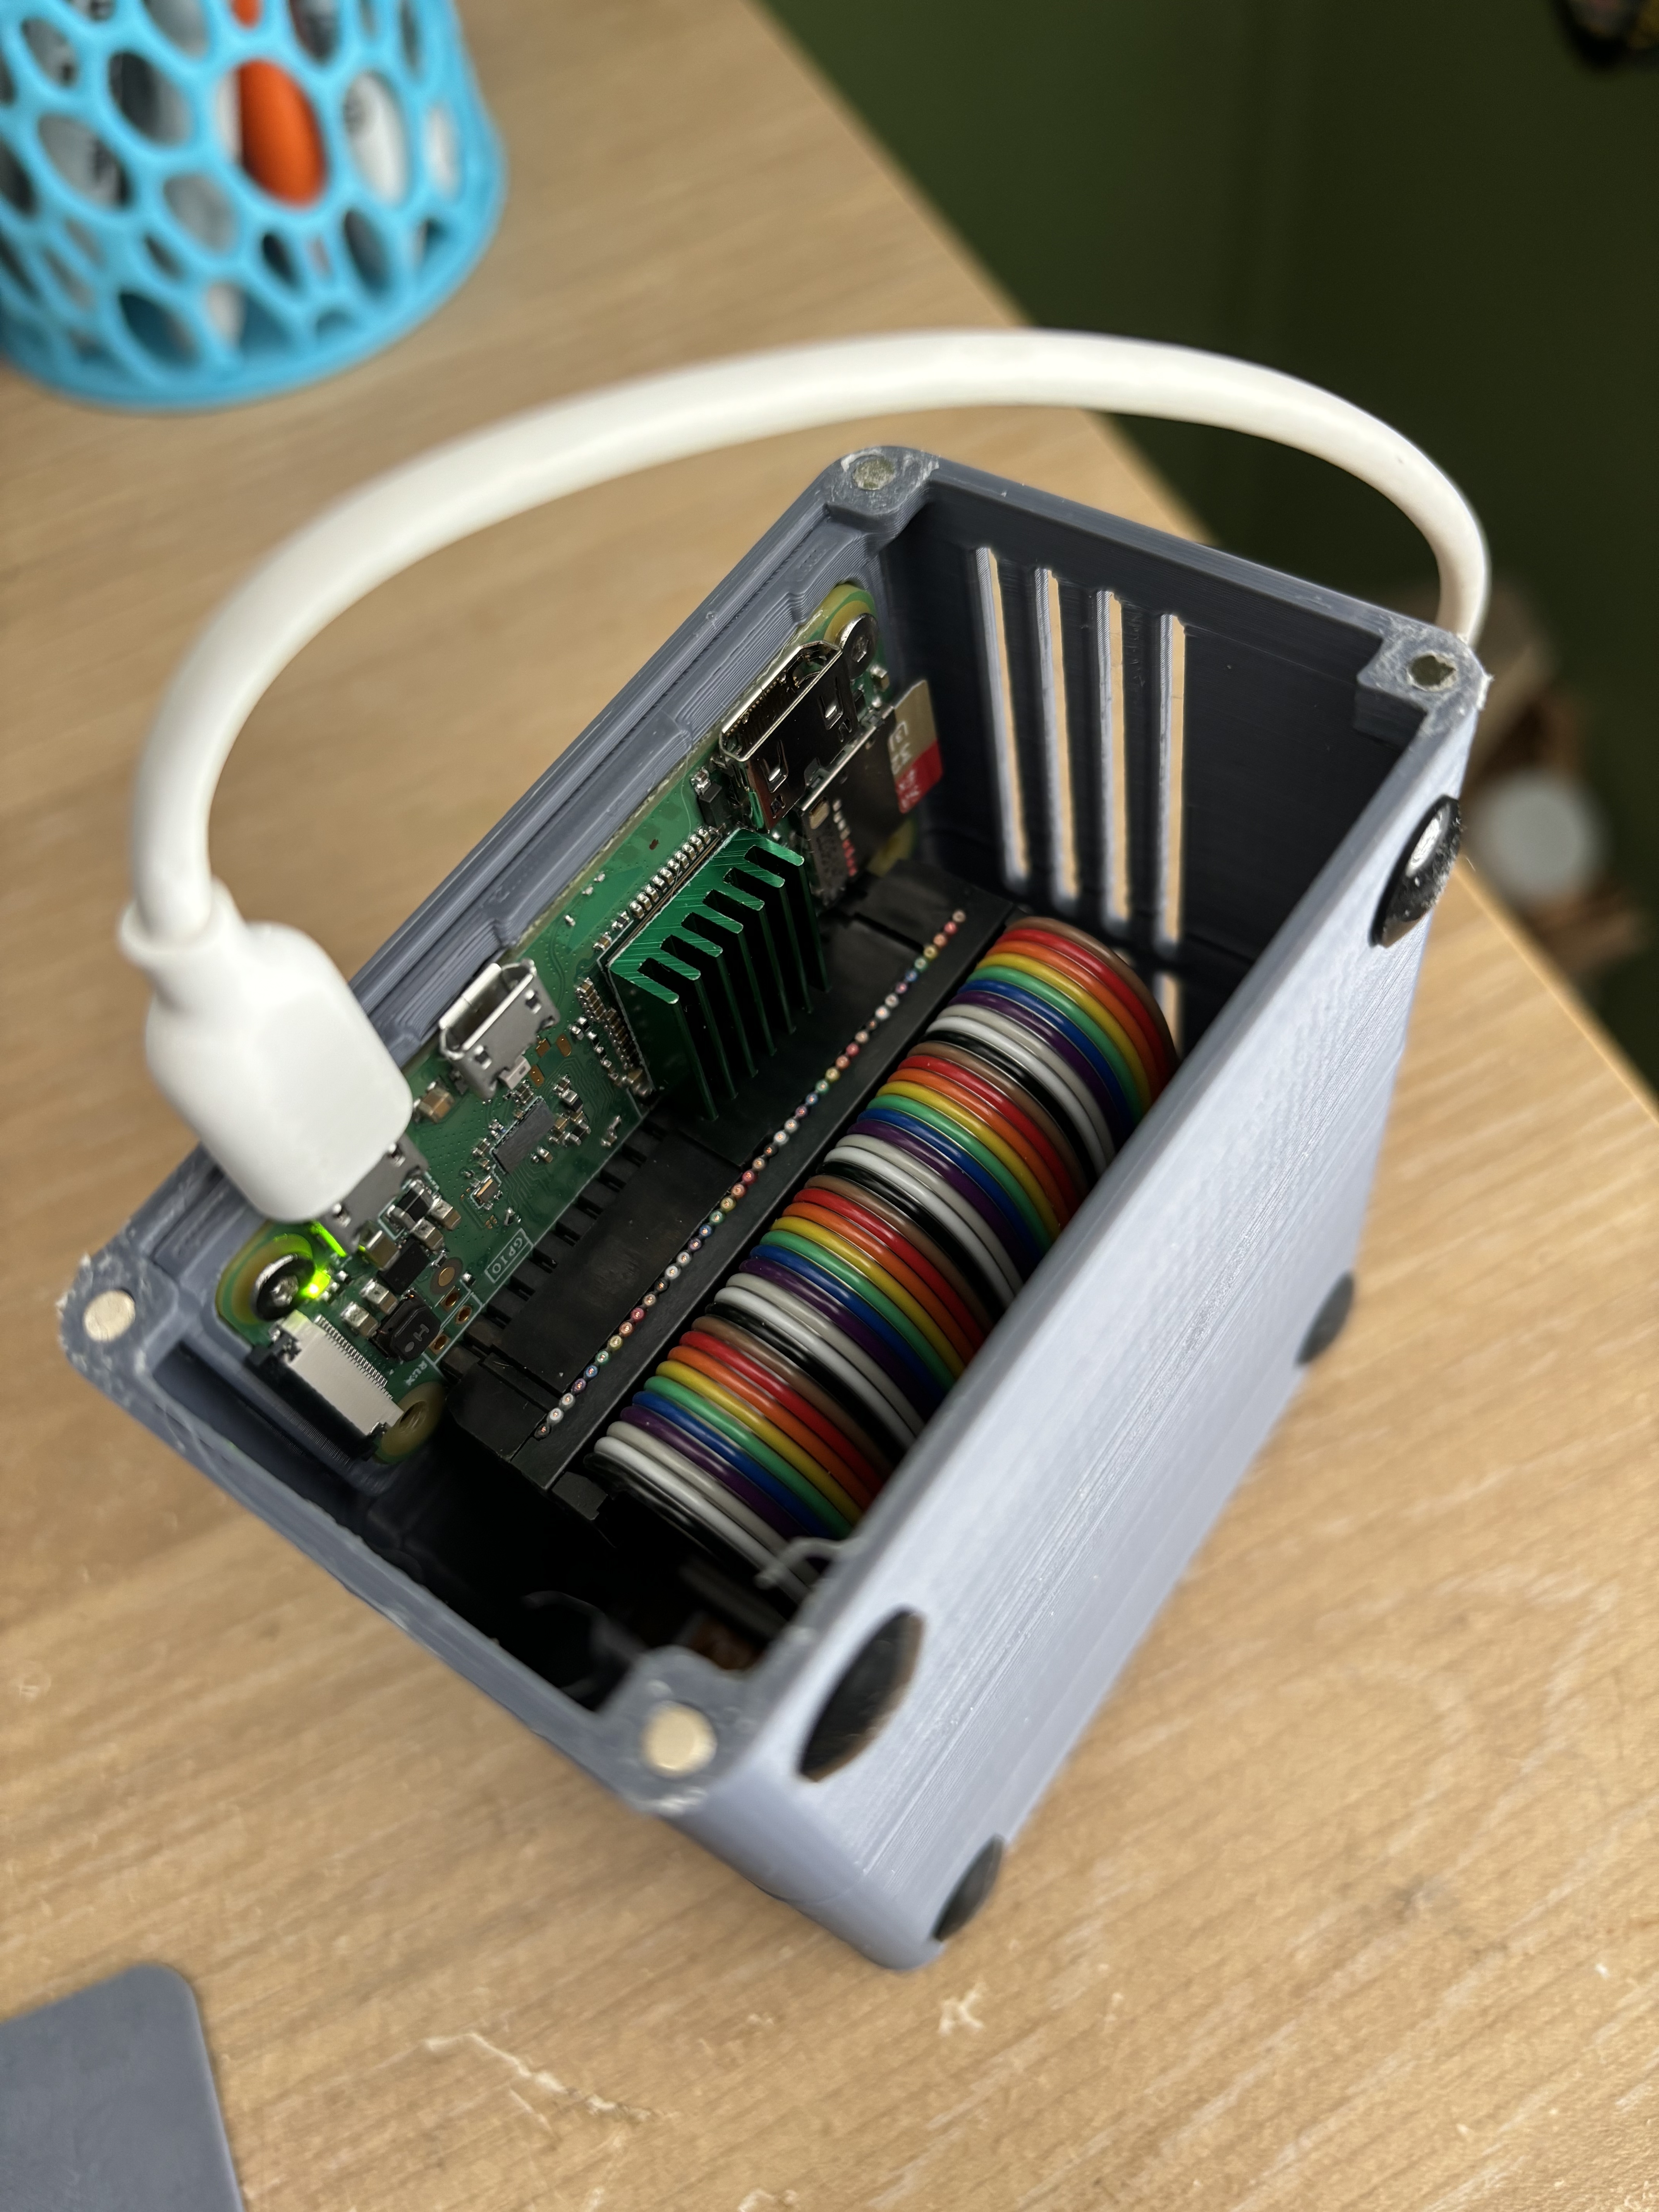
I had an issue with the hole in the back panel not being big enough for my cable, I'm too lazy to change it and print another so I just cut it and it works fine.
This works really well and allows me to easily access the Pi when I need to. I'm happy with how it turned out, and I'm looking forward to using the Enviro+ board in future projects. I'll be sure to share any cool projects I come up with using the board, so stay tuned!